Let’s we start how to emulate SROS router with Nokia vSR (virtual service router), like other network peripheral company, Nokia have vSR to support future network called Network function virtualization (NFV) that represents a new trend in networking where network functions that previously depended on custom hardware can now be deployed on commodity hardware using standard IT virtualization technologies for added flexibility.
Nokia Virtualized Service Router have following 2 NFV product :
- Virtualized Service Router – Simulator (VSR-SIM)
- Virtualized Service Router – Route Reflector (VSR-RR)
The VSR-SIM simulates the control, management, and forwarding functions of a 7750 SR or 7950 XRS router. The VSR-SIM runs the same service router operating system (SR OS) that runs on the 7750 SR and 7950 XRS hardware-based routers and has the same feature set and operation behaviour as those platform. Configuration of interface, network protocols, and services is done the same way as it is on a physical 7750 SR and 7950 XRS system.
The VSR-SIM is suitable for trials, training, and education (like me :-), and network simulation. it is optimized for testing and lab environment . It is not intended for deployment in a production network.
The VSR-RR virtualized the function of the control plane BGP route reflector (RR). It runs the SR OS and is functionally and operatinalluy equivalent to an SR-series router deployed as control-plane BGP route reflector. The VSR-RR is fully supported for live deployments, but it’s not designed for transit traffic forwarding.
I think the main different between vSR-RR and vSR-SIM is on the configuration chassis when you provisioning the Router, on the qemu options you can added the SMBIOS parameter that told to the image what you should botting do, like Chassis type, number of Card, and number of MDA. When the SMBIOS is not configured in qemu options the image booting with default configuration that is vSR-RR.
When we want use vSR-SIM, we need more resources because vSR-SIM will deploy in distributed mode, it means control plane (SF/CPM) and data plane (IOM/MDA) running in seperate VM.
So in this section, we will try to emulate Nokia vSR-RR in GNS3.
First, you must install GNS3, you can download the latest version at https://github.com/GNS3/gns3-gui/releases currently stable version is 1.5.2, and download the GNS3 VM VMware or GNS3 VM Virtualbox, you can select one of these, depending on the software virtualization what you use. I use VMware for virtualization so i have downloaded GNS3 VM VMware.
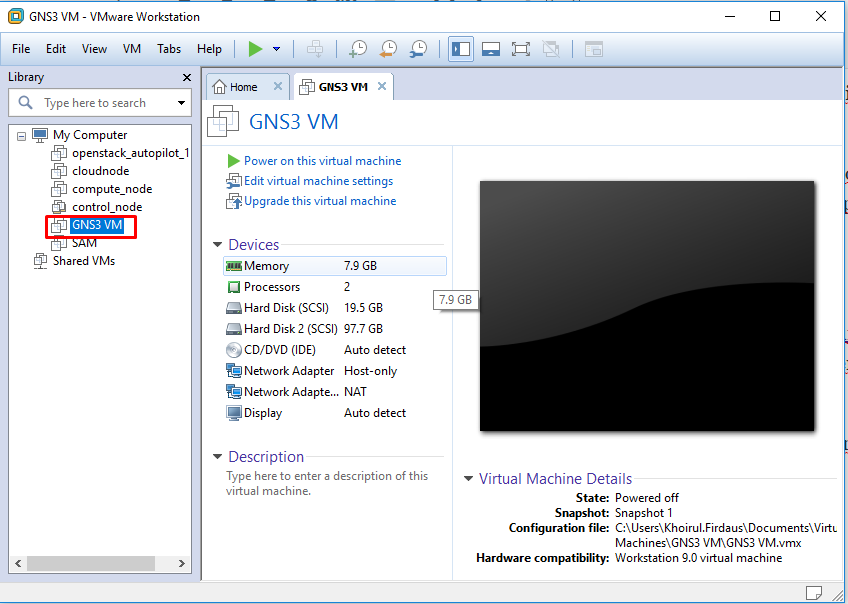
At this time we have GNS3 installer and GNS3 VM VMware, next step is import the GNS3 VM to VMware in File -> Open and select GNS3 VM.ova. wait for minutes to import process.
For all configuration Devices like Memory, Processors, and Networks Adapter have automatically setting when you open the GNS3 VM, but if your Memory not enough until 8 GB the configuration will adjust with your space. but i recommended use 16 GB physical RAM on your laptop or PC for best expereince, hahaha.
Ok,we done for VM configuration. let’s move to install GNS3, i believe that all reader have be able to install this favorite software ;-). so i’m not explained how to install this.
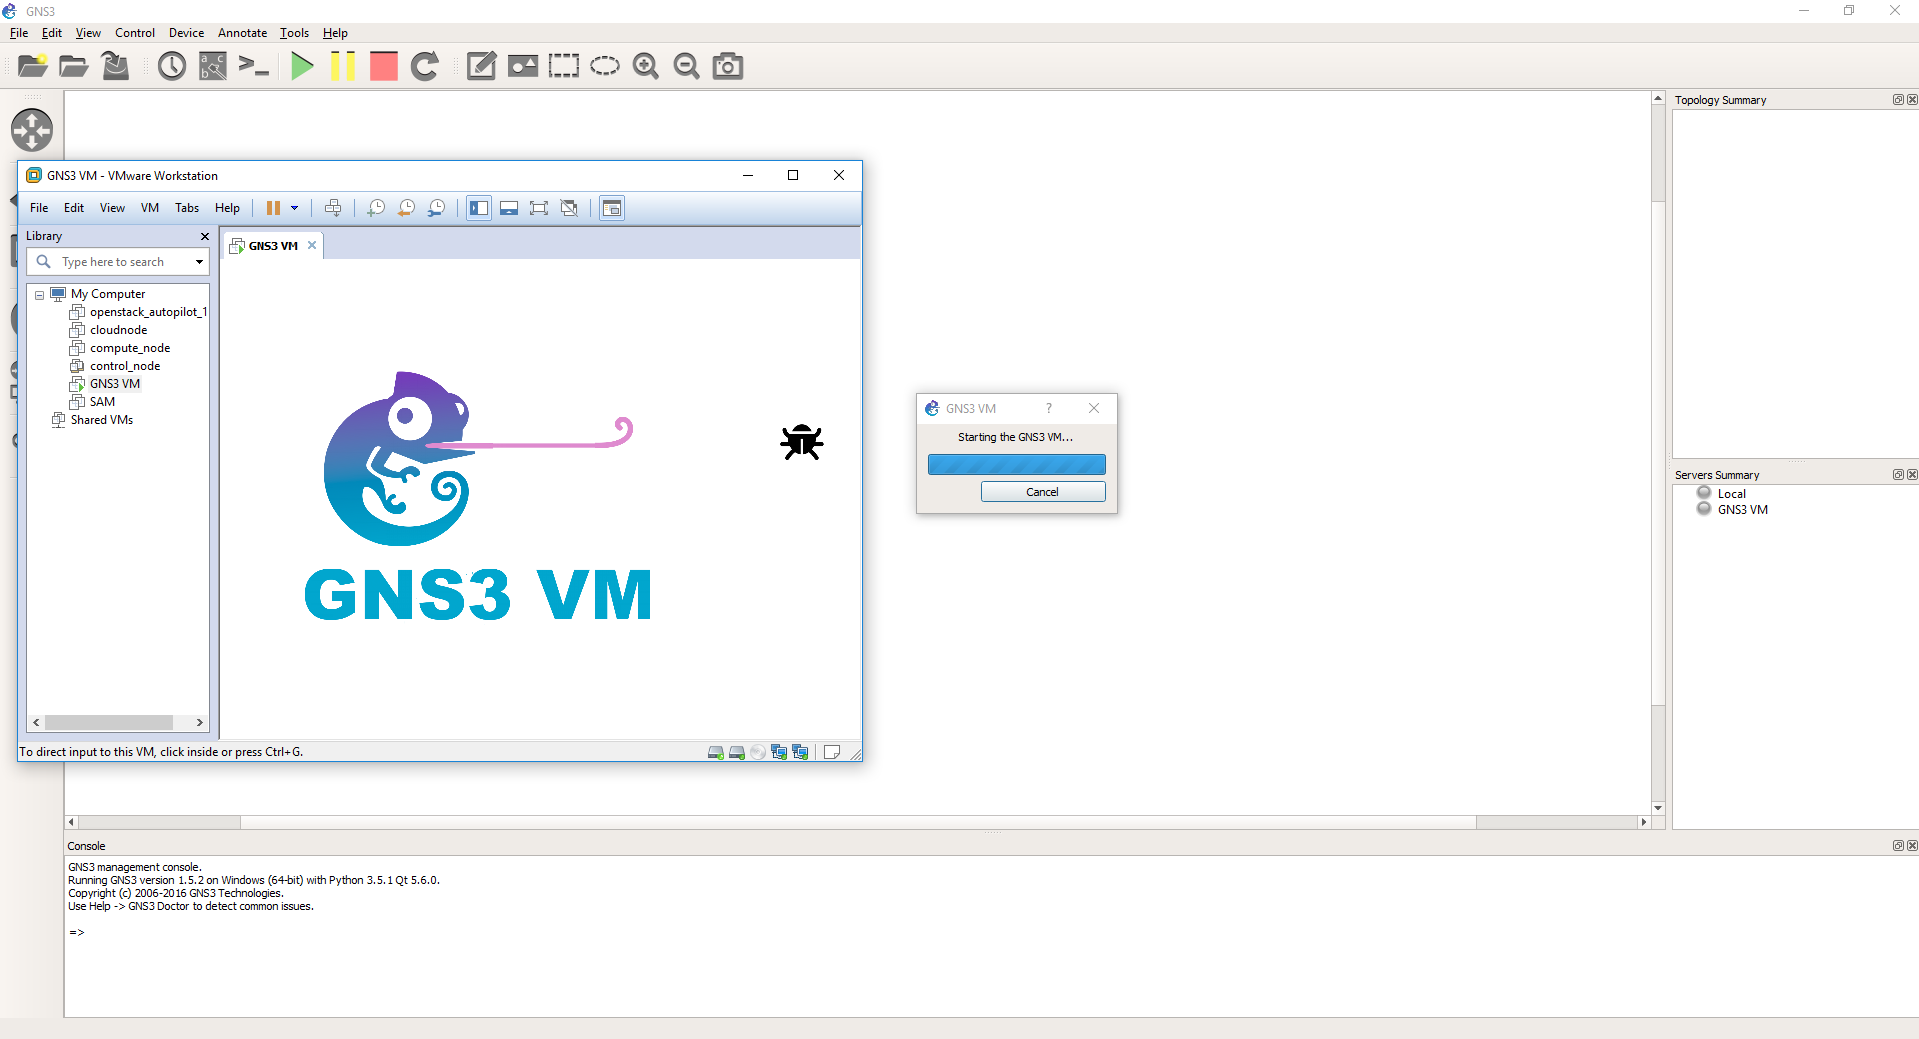
Assumed that we’ve done for installation, let’s Open di GNS3. when your GNS3 have opened, this software will contact the GNS3 VM that we’ve import before and start machine automaticaly as following.
We’ve done for all part of GNS3, let’s emulate the SROS, you must have the sros-vm.qcow2 file. to get this file you must contact your network administration or you can get from https://support.alcatel-lucent.com/portal/web/support. I used TIMOS version 13 R10.
Assumed that you have been getting the sros-vm.qcow2 file. In GNS3 select Help -> Setup Wizard, in server configuration choose Local GNS3 VM, then in virtualization software choose VMware as following.
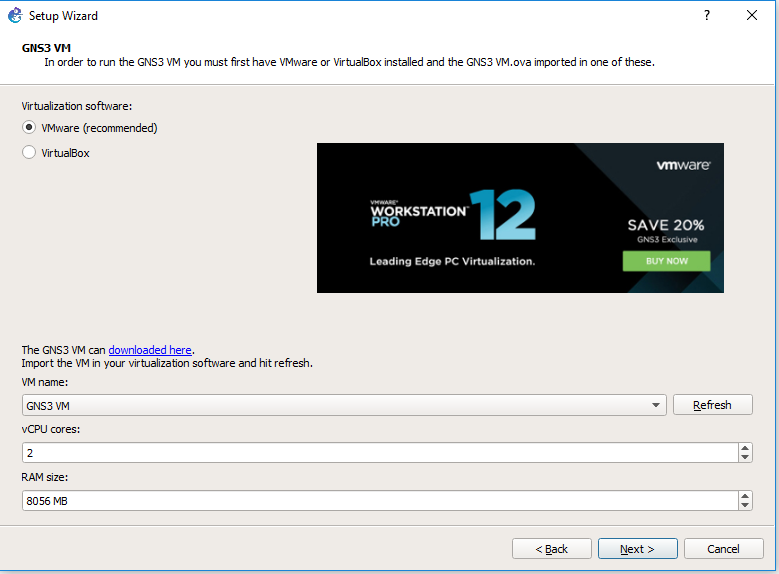
vCPU cores configuration is equal with cpu core in GNS3 VM and RAM size also equal with Memory in GNS3 VM, if your RAM configuration bigger than the GNS3 VM i think your machine is not working properly.
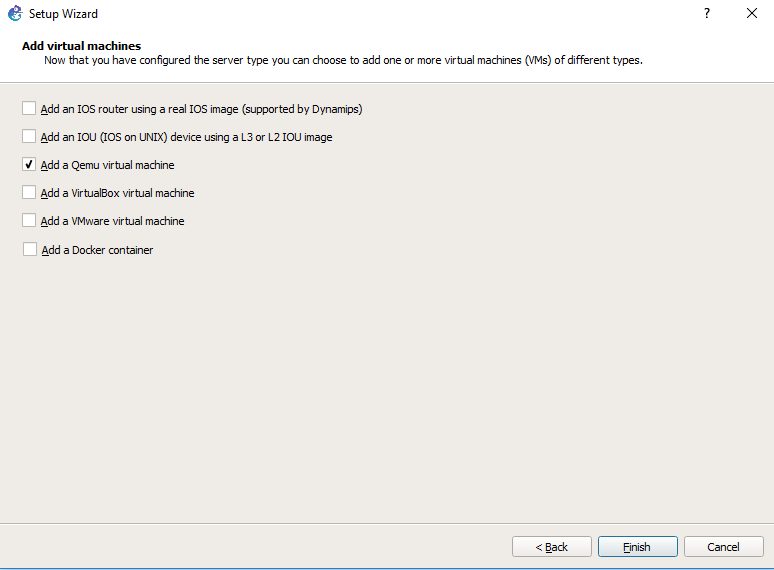
select Next for configure adding virtual machine, because we use .qcow2 file it means the file runs in Qemu virtualozation.
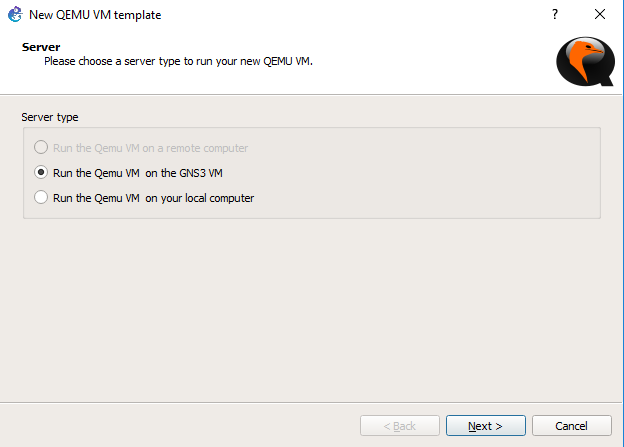
Select Finish to complete the configuration machine in GNS3 VM, because we’ve choose the Qemu emulator we also must configure the Qemu VM template, choose Run the Qemu VM on the GNS3 VM, and Next.
Next step is gives the QEMU VM name, and than we enter to the configuration QEMU binary and memory
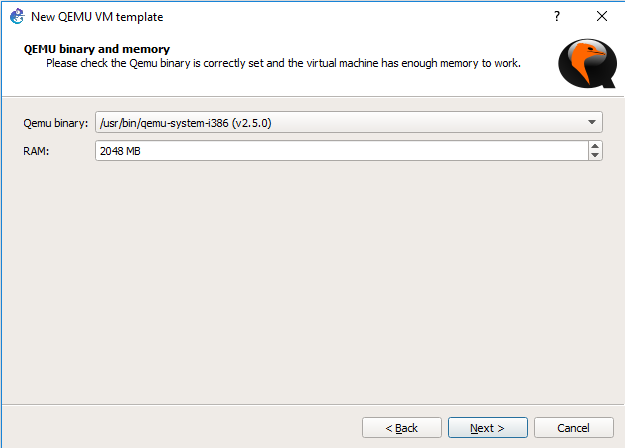
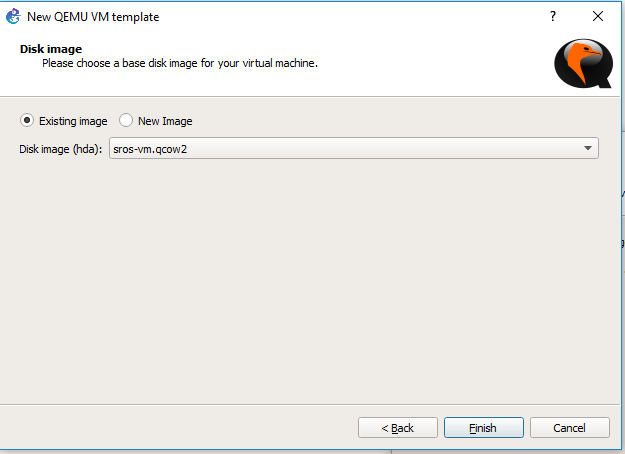
Choose Qemu binary to /usr/bin/qemu-system-i386 that mean the .qwow2 file will be execute in 32 bit system, on RAM configuration i recommended to space 2048 RAM. The Next step is upload the .qcow2 file into GNS3 VM as following.
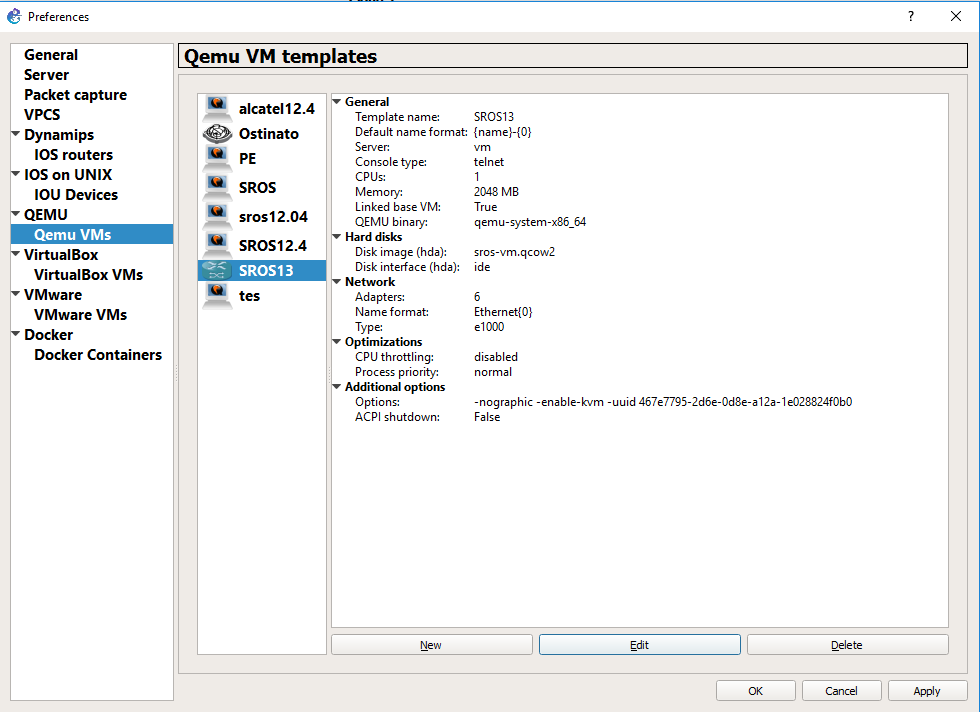
After you select Finish, the Preferences windows will appear for the next configuration. Select Edit and in the tab Network, adjust the interface until 6 adapter, each adapter we will be use one for system interface and five for port interface, than choose adapter type to Intel Gigabit Ethernet (e1000). In the tab Advanced Settings fill the form options in Additional settings with -nographic -enable-kvm -uuid.
The configuration looks like this.
The Setup for the SROS we’ve done and Let’s we Turn on the Router.
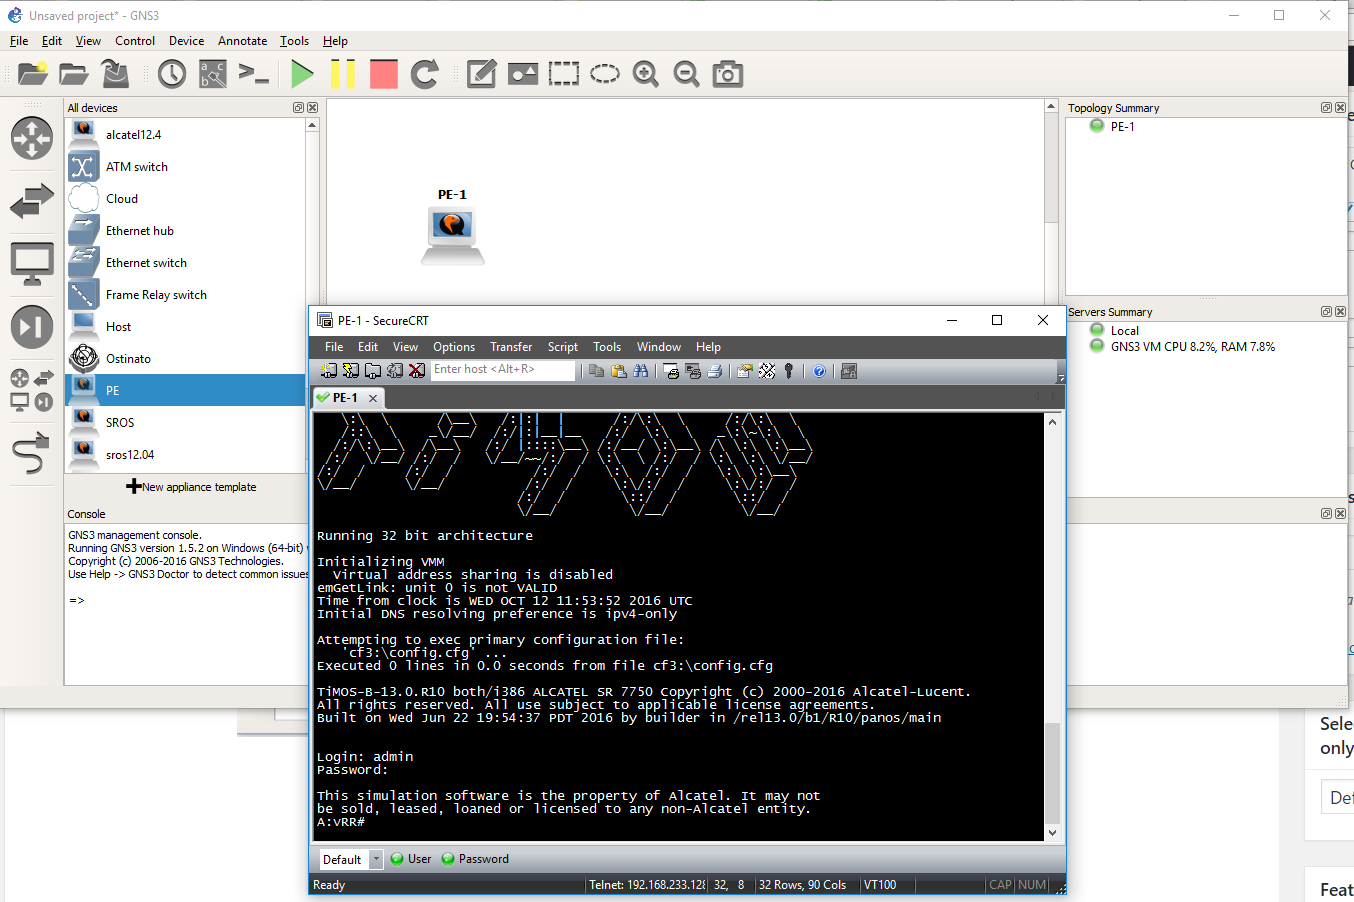
Just Explore the comment :
|
1 2 3 4 5 6 7 8 9 10 11 12 13 14 15 16 17 18 19 20 21 22 23 24 25 26 27 28 29 30 31 32 33 34 |
A:vRR# show card =============================================================================== Card Summary =============================================================================== Slot Provisioned Type Admin Operational Comments Equipped Type (if different) State State ------------------------------------------------------------------------------- 1 (not provisioned) up unprovisioned iom3-xp-b A sfm4-12 up up/active B sfm4-12 up down/standby (not equipped) =============================================================================== A:vRR# show system license =============================================================================== Current License =============================================================================== License status : reboot pending, missing license record Time remaining : CPM A will reboot the chassis in 60 minutes ------------------------------------------------------------------------------- License name : License uuid : Machine uuid : 95777e46-6e2d-8e0d-a12a-1e028824f0b0 License desc : License prod : License sros : Current date : SAT JUL 30 01:09:02 UTC 2016 Issue date : n/a Start date : n/a End date : n/a =============================================================================== |
We have iom3-xp-b in Card 1, but we do not enter the license, it means we must have a license to prevent the CPM reboot every 60 minutes. You must contact your network administrator (principal) to get the license. If you already have the license, you can insert the license to the vSR in a two way. In the next post i want to explain how to insert license vSR in GNS3 and how we can deploy vSR-SIM with distribution mode.
Network Telco Engineer – SDN/NFV Enthusiast
Komentar