![]()
Hello, i come back to write again, now i will to explain how to starting vagrant for the first time, well actually i’m not familiar with vagrant also, I curious about this when i want to emulate VXLAN tunneling between the Virtual Machine. I found some article that explained how easy to provisioning VM and apps with vagrant.
Vagrant is an open source software product for building and maintaining portable virtual machine development environment. the core idea behind its creation lies in the fact that the environment maintenance becomes increasingly difficult in a large project with multiple technical stack. Vagrant manages all the necessary configuration for developers in order to avoid unnecessery mintenance and setup time. Vagrant is written in Ruby Language.
Vagrant provision the machine on top of Virtualbox, VMware, AWS, or any other provider. i used virtualbox to provision the machine because is free. i assumed that you have been installing the latest virtualbox version, you can download vagrant from this link https://www.vagrantup.com/downloads.html. Because i used windows so i downloaded windows version.
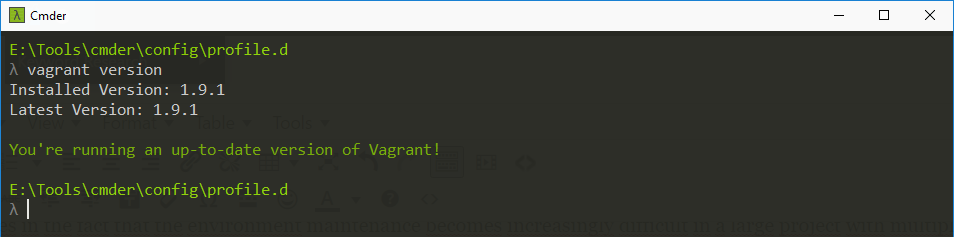
After that, install the executable file as usual if the installation finish you can open the command line interface, in this case i used CMDER as external CLI for windows that support for SSH.
i would to add the latest LTS version of Ubuntu (currently, Xenial – 16.04) as Operating System of the VM – this command tell vagrant to add such a box to its inventory vagrant box add ubuntu/xenial64, you can find more boxes at https://atlas.hashicorp.com/boxes/search.
lets make the folder that we use to store the box file machine, Create in the vagrant installation folder like mkdir \Vagrant\project\box1
and enter to the folder box1 cd \Vagrant\project\box1. We must initial vagrantfile with command vagrant init.

Vagrantfile contains the option about configuration of VM like vm box that we use, interface configuration, etc. I configure the vagrant file following :
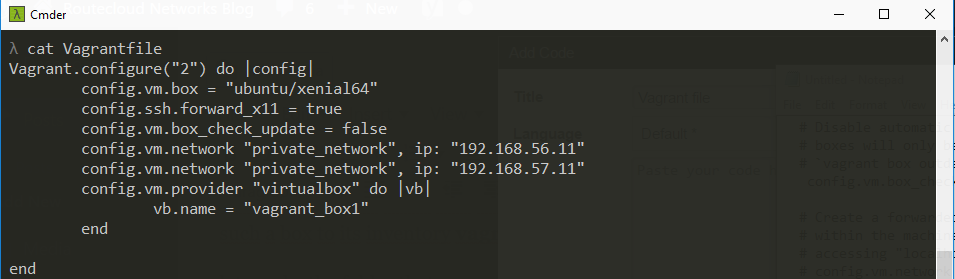
config.vm.box = “ubuntu/xenial64” ==> use ubuntu xenial64 for VM OS from box inventory
config.ssh.forward_x11 = true ==> Enable ssh X11 capability
config.vm.box_check_update = false ==> Disable ubuntu to check update
config.vm.network “private_network”, ip: “192.168.56.11” ==> configure ip address of VM with host only adapter
vb.name = “vagrant_box1” ==> Give name VM on Virtualbox
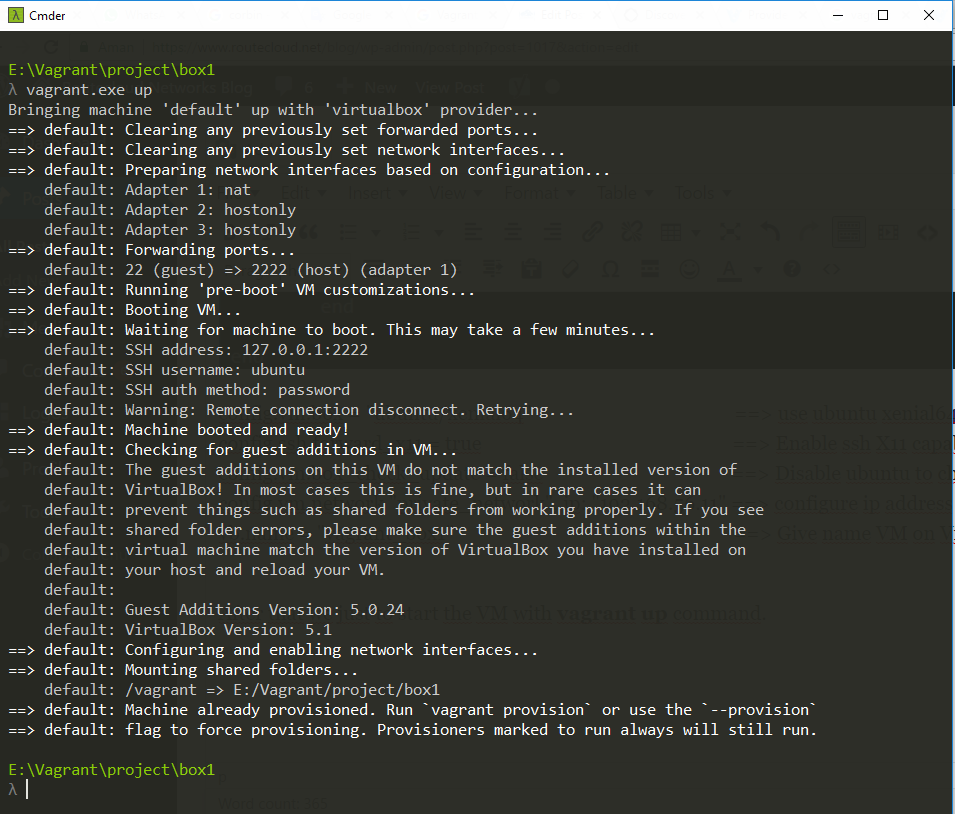
After that we just to start the VM with vagrant up command :
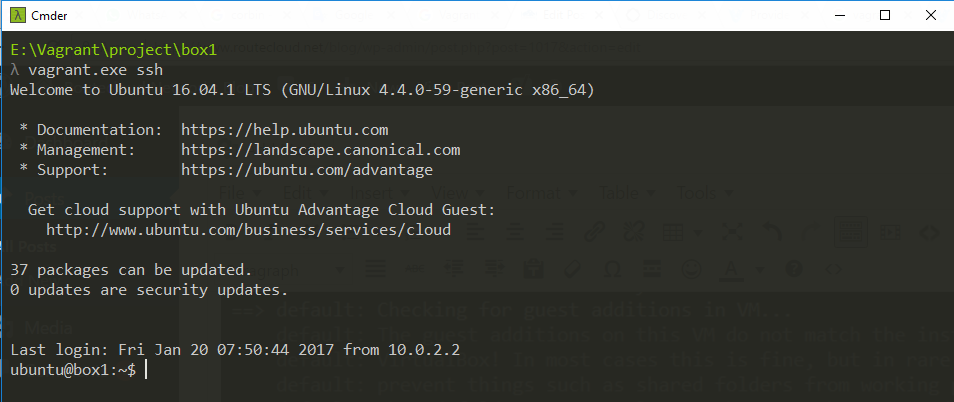
Now the VM has been starting, we can remote the VM with SSH :
After this post, i want to write how to create VXLAN tunneling between two VM with Linux namespace, and capture the packet between them with Wireshark, so stay tuned for the Next post in this blog.
Network Telco Engineer – SDN/NFV Enthusiast
Komentar