Baru saja Ubuntu merilis versi LTS (Long Term Support) yaitu versi 18.04 dengan code name Bionic Beaver. Pada artikel ini akan dijelaskan untuk melakukan instalasi dan konfigurasi NGINX dan PHP-FPM agar dapat menjadi web server di versi Ubuntu terbaru ini. Langsung kita mulai saja yaaaaa.

Update Package
|
1 |
arisyi@web-server:~$ sudo apt update |
Install NGINX
|
1 |
arisyi@web-server:~$ sudo apt install nginx |
Check Service NGINX
|
1 |
arisyi@web-server:~$ systemctl status nginx |

Check Listen Port NGINX
|
1 |
arisyi@web-server:~$ sudo netstat -tulpn |

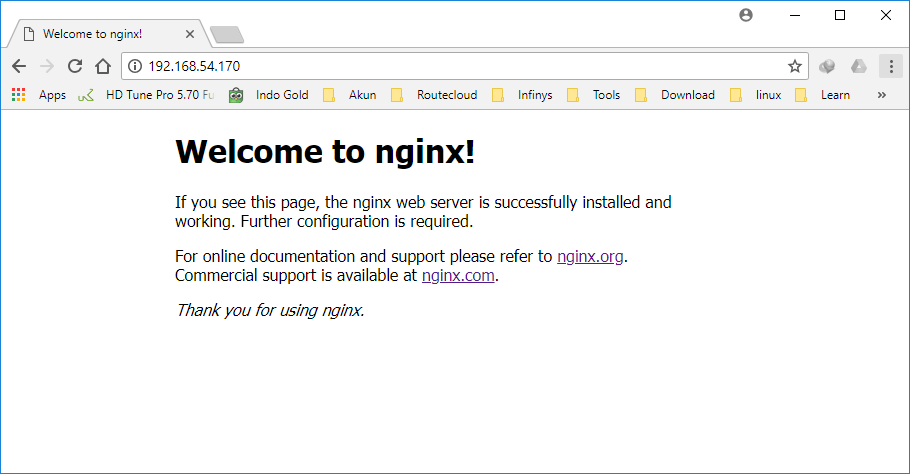
Check Browser
buka browser lalu masukkan IP server http://ipaddress/
Install PHP-FPM
|
1 |
arisyi@web-server:~$ sudo apt install php-fpm |
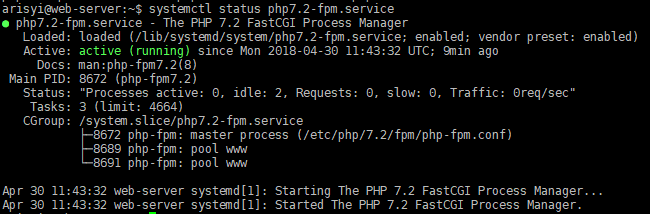
Check Service PHP-FPM
|
1 |
arisyi@web-server:~$ systemctl status php7.2-fpm.service |
Config NGINX for PHP
tambahkan baris dibawah ini pada config NGINX didalam server {}
|
1 |
arisyi@web-server:~$ sudo nano /etc/nginx/sites-enabled/default |
|
1 2 3 4 |
location ~ \.php$ { include snippets/fastcgi-php.conf; fastcgi_pass unix:/var/run/php/php7.2-fpm.sock; } |
Create File .php
|
1 |
arisyi@web-server:~$ sudo nano /var/www/html/rcn.php |
|
1 2 3 |
<?php phpinfo(); ?> |
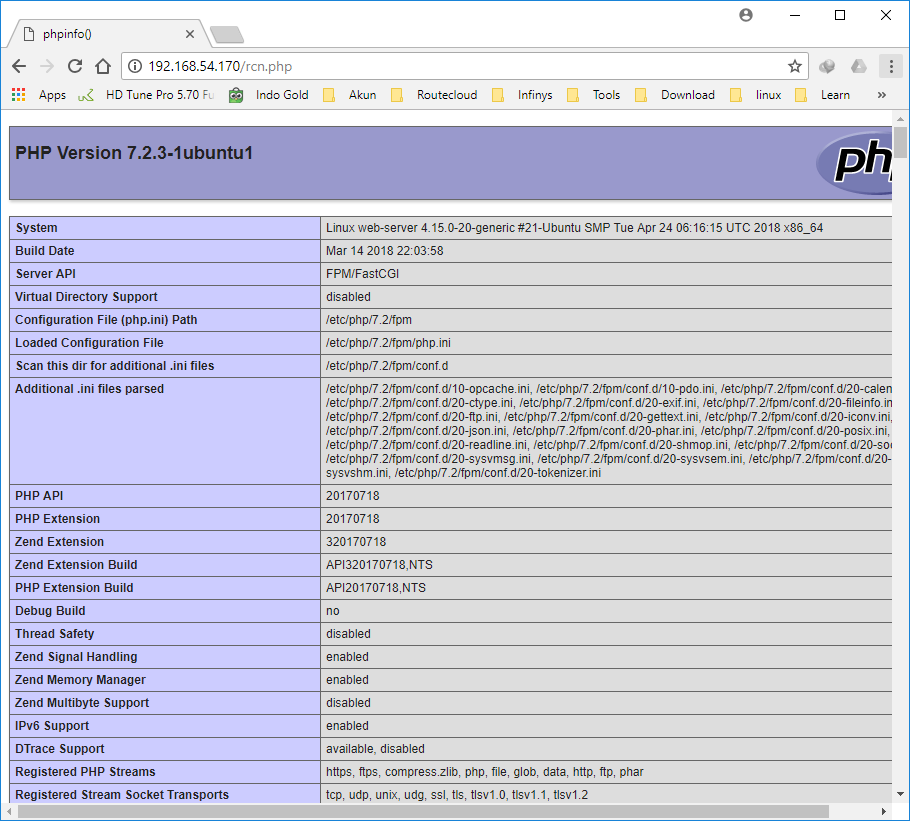
Check Browser
buka browser lalu masukkan IP server http://ipaddress/rcn.php
Sekian tutorial instalasi NGINX dan PHP-FPM di Ubuntu 18.04 LTS.
Komentar