Kemarin, saat mengunjungi website NGINX ternyata telah release versi stable yang sudah support untuk HTTP/2. Dimana dengan HTTP/2, website akan di-deliver ke client dengan lebih cepat dibanding dengan HTTP/1.1, bisa dilihat dari link ini https://http2.akamai.com/demo. karena itu admin langsung mau coba deh migrasiin web ini ke HTTP/2. Di tutorial ini yang akan diinstall adalah NGINX versi 1.10, PHP-FPM versi 7.0, dan MariaDB versi 10.1. Let’s get started.
Install NGINX 1.10
pertama yang dilakukan adalah upgrade centos terlebih dahulu
|
1 |
yum -y upgrade |
lalu di-restart jika telah selesai.
|
1 |
reboot |
karena udah kebiasaan menggunakan nano untuk editor dan juga wget untuk mendownload package NGINX, install dulu yaaa
|
1 |
yum install nano wget |
setelah itu kita siapkan beberapa tools pendukung untuk meng-compile NGINX dari source code.
|
1 |
yum install gcc openssl-devel pcre-devel |
lalu download source code NGINX 1.10
|
1 |
wget http://nginx.org/download/nginx-1.10.0.tar.gz |
setelah itu di-extract
|
1 |
tar xzvf nginx-1.10.0.tar.gz |
masuk ke directory yang telah di-ectract
|
1 |
cd nginx-1.10.0 |
oh iyaaa buat dulu user untuk NGINX nya
|
1 |
useradd -d /etc/nginx/ -s /sbin/nologin nginx |
di konfigure dahulu sebelum di compile
|
1 2 3 4 5 6 7 8 9 10 11 12 13 14 15 16 17 18 19 20 21 22 23 24 25 26 27 28 29 30 31 32 33 34 35 36 37 |
./configure \ --prefix=/etc/nginx \ --sbin-path=/usr/sbin/nginx \ --conf-path=/etc/nginx/nginx.conf \ --error-log-path=/var/log/nginx/error.log \ --http-log-path=/var/log/nginx/access.log \ --pid-path=/var/run/nginx.pid \ --lock-path=/var/run/nginx.lock \ --http-client-body-temp-path=/var/cache/nginx/client_temp \ --http-proxy-temp-path=/var/cache/nginx/proxy_temp \ --http-fastcgi-temp-path=/var/cache/nginx/fastcgi_temp \ --http-uwsgi-temp-path=/var/cache/nginx/uwsgi_temp \ --http-scgi-temp-path=/var/cache/nginx/scgi_temp \ --user=nginx \ --group=nginx \ --with-http_ssl_module \ --with-http_realip_module \ --with-http_addition_module \ --with-http_sub_module \ --with-http_dav_module \ --with-http_flv_module \ --with-http_mp4_module \ --with-http_gunzip_module \ --with-http_gzip_static_module \ --with-http_random_index_module \ --with-http_secure_link_module \ --with-http_stub_status_module \ --with-http_auth_request_module \ --with-threads \ --with-stream \ --with-stream_ssl_module \ --with-http_slice_module \ --with-mail \ --with-mail_ssl_module \ --with-file-aio \ --with-http_v2_module \ --with-ipv6 |
lalu di-compile
|
1 |
make |
dan
|
1 |
make install |
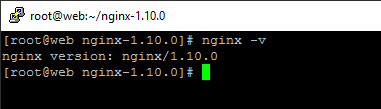
untuk verifikasi jalankan perintah
|
1 |
nginx -v |
dan akan tampil seperti diwabah ini :
kita tambahkan file executable untuk memudahkan start/stop service NGINX
|
1 |
nano /etc/init.d/nginx |
|
1 2 3 4 5 6 7 8 9 10 11 12 13 14 15 16 17 18 19 20 21 22 23 24 25 26 27 28 29 30 31 32 33 34 35 36 37 38 39 40 41 42 43 44 45 46 47 48 49 50 51 52 53 54 55 56 57 58 59 60 61 62 63 64 65 66 67 68 69 70 71 72 73 74 75 76 77 78 79 80 81 82 83 84 85 86 87 88 89 90 91 92 93 94 95 96 97 98 99 100 101 102 103 104 105 106 107 108 109 110 111 112 113 114 115 116 117 118 119 120 121 122 123 124 125 126 127 128 129 |
#!/bin/sh # # nginx - this script starts and stops the nginx daemon # # chkconfig: - 85 15 # description: Nginx is an HTTP(S) server, HTTP(S) reverse \ # proxy and IMAP/POP3 proxy server # processname: nginx # config: /etc/nginx/nginx.conf # config: /etc/sysconfig/nginx # pidfile: /var/run/nginx.pid # Source function library. . /etc/rc.d/init.d/functions # Source networking configuration. . /etc/sysconfig/network # Check that networking is up. [ "$NETWORKING" = "no" ] && exit 0 nginx="/usr/sbin/nginx" prog=$(basename $nginx) NGINX_CONF_FILE="/etc/nginx/nginx.conf" [ -f /etc/sysconfig/nginx ] && . /etc/sysconfig/nginx lockfile=/var/lock/subsys/nginx make_dirs() { # make required directories user=`$nginx -V 2>&1 | grep "configure arguments:" | sed 's/[^*]*--user=\([^ ]*\).*/\1/g' -` if [ -z "`grep $user /etc/passwd`" ]; then useradd -M -s /bin/nologin $user fi options=`$nginx -V 2>&1 | grep 'configure arguments:'` for opt in $options; do if [ `echo $opt | grep '.*-temp-path'` ]; then value=`echo $opt | cut -d "=" -f 2` if [ ! -d "$value" ]; then # echo "creating" $value mkdir -p $value && chown -R $user $value fi fi done } start() { [ -x $nginx ] || exit 5 [ -f $NGINX_CONF_FILE ] || exit 6 make_dirs echo -n $"Starting $prog: " daemon $nginx -c $NGINX_CONF_FILE retval=$? echo [ $retval -eq 0 ] && touch $lockfile return $retval } stop() { echo -n $"Stopping $prog: " killproc $prog -QUIT retval=$? echo [ $retval -eq 0 ] && rm -f $lockfile return $retval } restart() { configtest || return $? stop sleep 1 start } reload() { configtest || return $? echo -n $"Reloading $prog: " killproc $nginx -HUP RETVAL=$? echo } force_reload() { restart } configtest() { $nginx -t -c $NGINX_CONF_FILE } rh_status() { status $prog } rh_status_q() { rh_status >/dev/null 2>&1 } case "$1" in start) rh_status_q && exit 0 $1 ;; stop) rh_status_q || exit 0 $1 ;; restart|configtest) $1 ;; reload) rh_status_q || exit 7 $1 ;; force-reload) force_reload ;; status) rh_status ;; condrestart|try-restart) rh_status_q || exit 0 ;; *) echo $"Usage: $0 {start|stop|status|restart|condrestart|try-restart|reload|force-reload|configtest}" exit 2 esac |
lalu tambahkan attribute executable ke file tersebut
|
1 |
chmod +x /etc/init.d/nginx |
dan coba untuk jalankan service NGINX
|
1 |
service nginx start |
sekarang coba buka browser dan coba akses

Install PHP-FPM 7.0
kalau sudah selesai install NGINX mari dilanjut install php-fpm agar bisa memproses PHP.
ada beberapa tools yang diperlukan, yaitu Repo Remi, karena di repo ini yang udah nge-release versi terbarunya dari PHP. berikut langkah-langkahnya :
menambahkan repo remi, sebelum menambahkan repo remi dibutuhkan terlebih dahulu repo dari EPEL, menambahkannya dengan cara
|
1 |
yum install epel-release |
setelah itu lanjut untuk menambahkan repo REMI
|
1 |
rpm -Uvh http://rpms.famillecollet.com/enterprise/remi-release-7.rpm |
lalu install package PHP-FPM versi 7.0
|
1 |
yum install php70-php-fpm php70-php-gd php70-php-mbstring php70-php-mcrypt php70-php-mysqlnd php70-php-xmlrpc |
setelah itu ada tambahan config pada /etc/opt/remi/php70/php-fpm.d/www.conf
|
1 |
nano /etc/opt/remi/php70/php-fpm.d/www.conf |
cari user dan group, lalu ganti isinya dengan ‘nginx’
|
1 2 |
user = nginx group = nginx |
lalu ubah juga nilai dari cgi.fix_pathinfo menjadi 0 pada file /etc/opt/remi/php70/php.ini
|
1 |
cgi.fix_pathinfo=0 |
setelah ini tambahkan config di NGINX agar dapat meneruskan proses PHP ke PHP-FPM
|
1 |
nano /etc/nginx/nginx.conf |
|
1 2 3 4 5 6 7 |
location ~ \.php$ { root html; fastcgi_pass 127.0.0.1:9000; fastcgi_index index.php; fastcgi_param SCRIPT_FILENAME $document_root$fastcgi_script_name; include fastcgi_params; } |
setelah itu buat file testing php untuk melihat apakah php-fpm nya sudah berfungsi
|
1 |
nano /etc/nginx/html/tes.php |
|
1 2 3 |
<?php phpinfo(); ?> |
jika sudah start PHP-FPM dan juga restart NGINX
|
1 2 |
service php70-php-fpm start service nginx restart |
jika sudah coba buka browser dan coba akses

Install MariaDB 10.1
nah, ini yang terakhir nih MariaDB, sebenernya sih admin baru tau MariaDB ini saat mulai nyoba-nyobain CentOS 7 dimana kalau mau install MySQL eh malah disuruh install MariaDB, ternyata default-nya di CentOS 7 ini MariaDB telah menggantikan MySQL, walaupun sebenarnya saat menggunakan MariaDB, ngak beda jauh dengan MySQL, mungkin ada kelebihannya dibanding MySQL (pasti ada sih haha)
untuk menginstall MariaDB yang versi terbaru kita harus menggunakan repo dari MariaDB nya langsung, seperti dibawah ini
|
1 |
nano /etc/yum.repos.d/MariaDB.repo |
|
1 2 3 4 5 |
[mariadb] name = MariaDB baseurl = http://yum.mariadb.org/10.1/centos7-amd64 gpgkey=https://yum.mariadb.org/RPM-GPG-KEY-MariaDB gpgcheck=1 |
setelah itu tinggal diinstall
|
1 |
yum install MariaDB-server MariaDB-client |
mudah kan??? hehe, lalu start MariaDB-nya
|
1 |
service mariadb start |
nah kalau udah, di setup dahulu MariaDB nya
|
1 |
mysql_secure_installation |
|
1 2 3 4 5 6 7 8 9 10 11 12 13 14 15 16 17 18 19 20 |
Enter current password for root (enter for none): OK, successfully used password, moving on... Set root password? [Y/n] y New password: Re-enter new password: Password updated successfully! Remove anonymous users? [Y/n] y ... Success! Disallow root login remotely? [Y/n] y ... Success! Remove test database and access to it? [Y/n] y - Dropping test database... ... Success! Reload privilege tables now? [Y/n] y ... Success! |
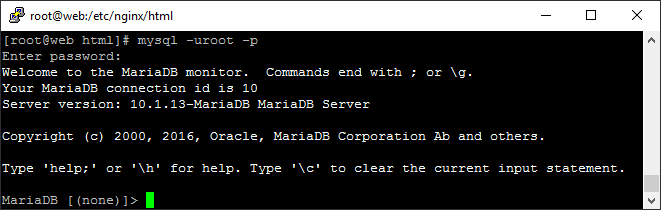
setelah itu coba login
|
1 |
mysql -uroot -p |
oke, cukup sekian dulu yaa, nantikan tutorial berikutnya, selamat mencoba.
Komentar